WLAN4-6: Unterschied zwischen den Versionen
Mkurz (Diskussion | Beiträge) (Die Seite wurde neu angelegt: „First of all, thanks to Akademikerhilfe for installing wifi-accesspoints all over the building in Pfeilheim4-6 as this guide could be never written otherwise ;…“) |
Mkurz (Diskussion | Beiträge) (Der Seiteninhalt wurde durch einen anderen Text ersetzt: „{{pfeilheim_wlan}}“) (Markierung: Ersetzt) |
||
| (23 dazwischenliegende Versionen von 2 Benutzern werden nicht angezeigt) | |||
| Zeile 1: | Zeile 1: | ||
| − | + | {{pfeilheim_wlan}} | |
| − | |||
| − | |||
| − | |||
| − | |||
| − | |||
| − | |||
| − | |||
| − | |||
| − | |||
| − | |||
| − | |||
| − | |||
| − | |||
| − | |||
| − | |||
| − | |||
| − | |||
Aktuelle Version vom 19. April 2019, 00:10 Uhr
First of all, thanks to Akademikerhilfe for installing wifi-accesspoints all over the building inside Pfeilheim4-6 as this guide would not have come to existance otherwise ;)
If you are looking for the description in german take a look here → Wlan4-6
Inhaltsverzeichnis
SSID
pfeilheim_wlan
Configuration
- If you moved in before May 2018, login at Akademikerhilfe-Portal and change your password
- If you have used a wifi called 'pfeilheim-wlan' before, delete this wifi-profile
- Connect to pfeilheim-wlan and enter your valid credentials
Troubleshooting
Invalid credentials:
- If you changed the Akademikerhilfe-Portal password, the wifi password has to be changed too!
- Make sure you can log in at Akademikerhilfe-Portal with the exact same credentials
- Change the password at the Akademikerhilfe-Portal
Detailed Instructions
As always: if you have further questions or problems with the configuration, drop a mail: support@pfeilheim.sth.ac.at
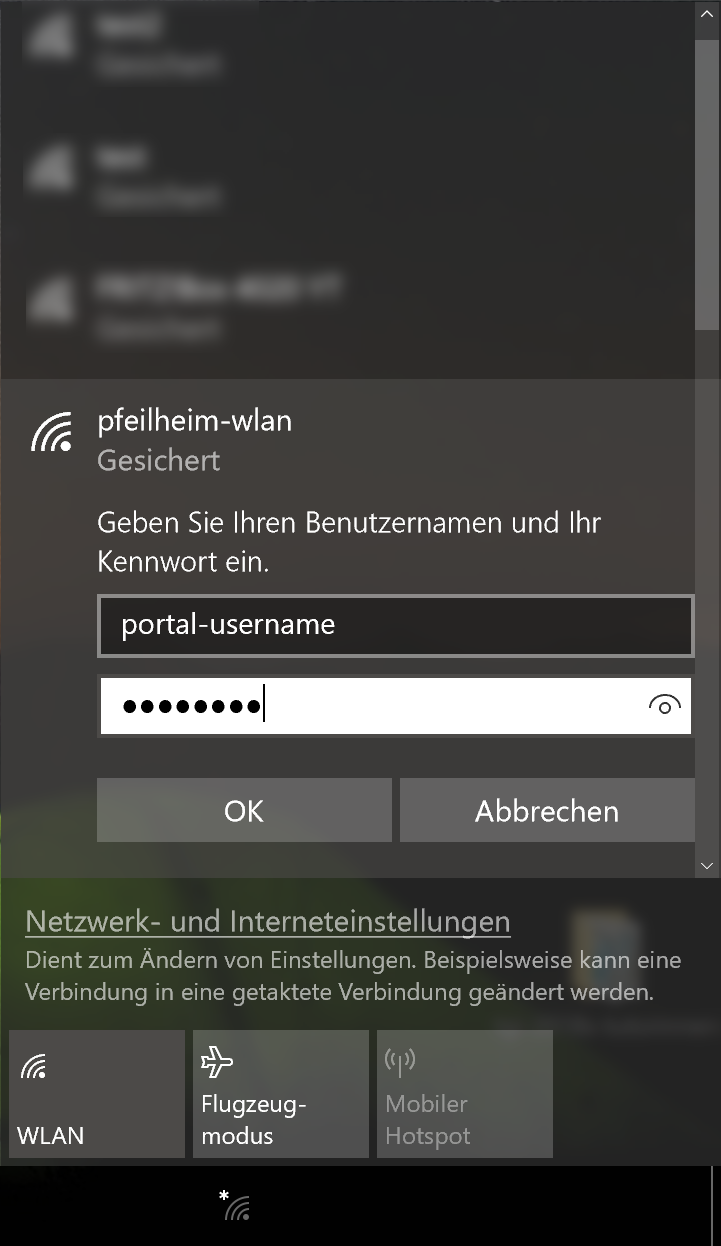
Windows 10
Guide for deleting a wireless profile (if you've used 'pfeilheim-wlan' before)
-
 Step2:
Use the same login credentials as for the Akademikerhilfe-Portal
Note: You have to change your the portal-password before the login works!


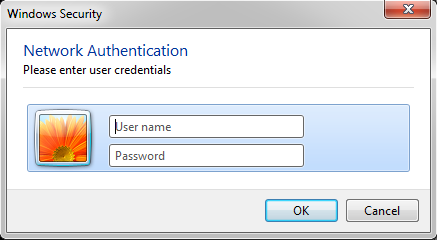
Windows 7
Guide for deleting a wireless profile (if you've used 'pfeilheim-wlan' before)
-
 Step2:
Use the same login credentials as for the Akademikerhilfe-Portal
Note: You have to change your the portal-password before the login works!


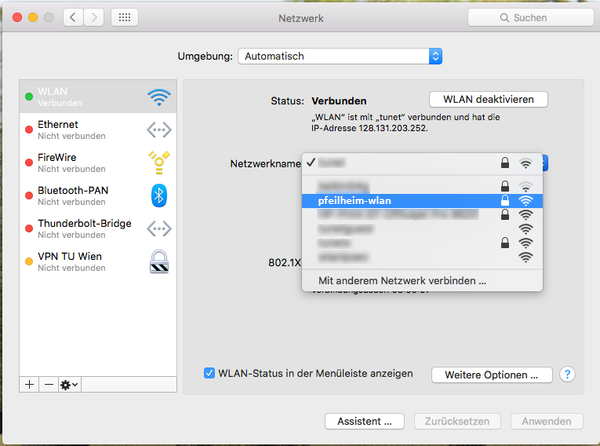
Mac OSX
Guide for deleting a wireless profile (if you've used 'pfeilheim-wlan' before)
-
 Step 2:
Select the wireless-network called pfeilheim-wlan
Use the same login credentials as for the Akademikerhilfe-Portal
Note: You have to change your the portal-password before the login works!


Source: https://www.zid.tuwien.ac.at/tunet/wlan/anleitungen/mac_os_x/
Android
Guide for deleting a wireless profile (if you've used 'pfeilheim-wlan' before)
-
 Step2:
Use the same login credentials as for the Akademikerhilfe-Portal
Note: You have to change your the portal-password before the login works! -
 Step2:
Use the same login credentials as for the Akademikerhilfe-Portal
Note: You have to change your portal-password before the login works!


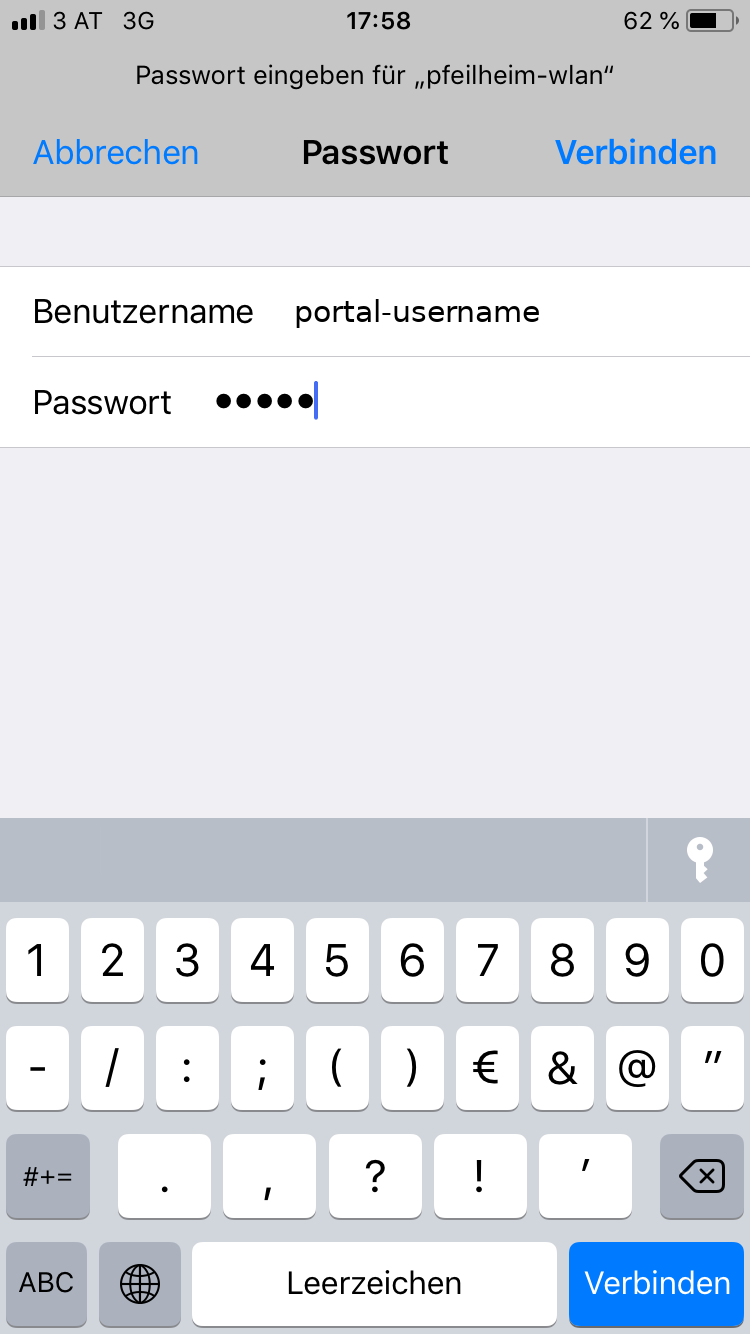
iOS
Guide for deleting a wireless profile (if you've used 'pfeilheim-wlan' before)


