WLAN4-6: Unterschied zwischen den Versionen
Mkurz (Diskussion | Beiträge) |
Mkurz (Diskussion | Beiträge) |
||
| Zeile 13: | Zeile 13: | ||
<li style="display: inline-block;"> [[File:Win7_radius6.png|thumb|||<b>Step6:</b><br>Click on <b>Settings</b>]] </li> | <li style="display: inline-block;"> [[File:Win7_radius6.png|thumb|||<b>Step6:</b><br>Click on <b>Settings</b>]] </li> | ||
<li style="display: inline-block;"> [[File:Win7_radius7.png|thumb|||<b>Step7:</b><br>1-3 should be equal to your configuration, simply tick 4 and 5 and add a 'public-name']] </li> | <li style="display: inline-block;"> [[File:Win7_radius7.png|thumb|||<b>Step7:</b><br>1-3 should be equal to your configuration, simply tick 4 and 5 and add a 'public-name']] </li> | ||
| + | </ul></div> | ||
| + | |||
| + | ==Windows 10== | ||
| + | <div><ul> | ||
| + | <li style="display: inline-block;"> [[File:Eduroam-win10 1.PNG|thumb|||<b>Step1:</b><br>Turn on wifi an open the wifi-overview</b>]] </li> | ||
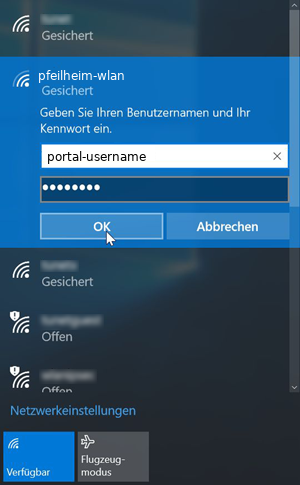
| + | <li style="display: inline-block;"> [[File:Eduroam-win10 2.PNG|thumb|||<b>Step2:</b><br>Select the wireless-network called <b>pfeilheim-wlan</b>]] </li> | ||
| + | <li style="display: inline-block;"> [[File:Eduroam-win10 3.png|thumb|||<b>Step3:</b><br>Use the same login credentials as for the [https://portal.akademikerhilfe.at Akademikerhilfe-Portal]<br><b>Note: You have to change your the portal-password before the login works!</b>]] </li> | ||
| + | <li style="display: inline-block;"> [[File:Eduroam-win10 4.png|thumb|||<b>Step4:</b><br>Check that the fingerprint matches with this one: <will be provided in the next days>]] </li> | ||
| + | <li style="display: inline-block;"> [[File:Eduroam-win10 5.png|thumb|||<b>Step5:</b><br>the Connections is establish, internet is working]] </li> | ||
| + | Quelle: https://www.zid.tuwien.ac.at/tunet/wlan/anleitungen/windows_10/ | ||
| + | </ul></div> | ||
| + | |||
| + | ==Windows OSX== | ||
| + | <div><ul> | ||
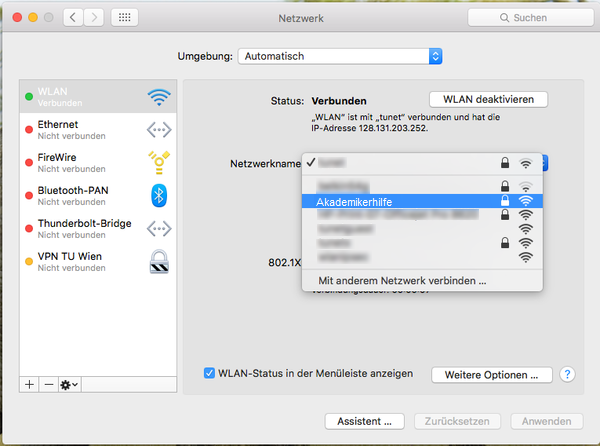
| + | <li style="display: inline-block;"> [[File:Eduroam-mac-1.png|thumb|||<b>Step1:</b><br>Open System-configuration to add a new wifi-network]] </li> | ||
| + | <li style="display: inline-block;"> [[File:Eduroam-mac-0.png|thumb|||<b>Step2:</b><br><b>Select the wireless-network called <b>pfeilheim-wlan<b><br>Use the same login credentials as for the [https://portal.akademikerhilfe.at Akademikerhilfe-Portal]<br><b>Note: You have to change your the portal-password before the login works!</b>]] </li> | ||
| + | <li style="display: inline-block;"> [[File:Eduroam-mac-3.png|thumb|||<b>Step3:</b><br>click <b>Connect</b>]] </li> | ||
| + | Quelle: https://www.zid.tuwien.ac.at/tunet/wlan/anleitungen/mac_os_x/ | ||
</ul></div> | </ul></div> | ||
Version vom 20. April 2018, 07:06 Uhr
First of all, thanks to Akademikerhilfe for installing wifi-accesspoints all over the building in Pfeilheim4-6 as this guide would never would not have come to existance otherwise ;)
To get started, this page shows how to configure various devices with security in mind. Your login credentials will be the same as those you use for extending your users' agreement (Benützervertrag).
Note: Before you can login with the login-credentials you have to change your password first (you can 'change' it to the same as it was before), the crucial step is the re-setting.
Inhaltsverzeichnis
Configurations
Windows 7
-
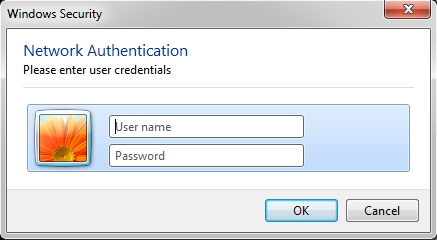 Step2:
Use the same login credentials as for the Akademikerhilfe-Portal
Note: You have to change your the portal-password before the login works!


Windows 10
-
 Step3:
Use the same login credentials as for the Akademikerhilfe-Portal
Note: You have to change your the portal-password before the login works!


Quelle: https://www.zid.tuwien.ac.at/tunet/wlan/anleitungen/windows_10/
Windows OSX
-
 Step2:
Select the wireless-network called pfeilheim-wlan
Use the same login credentials as for the Akademikerhilfe-Portal
Note: You have to change your the portal-password before the login works!


Quelle: https://www.zid.tuwien.ac.at/tunet/wlan/anleitungen/mac_os_x/
Android
-
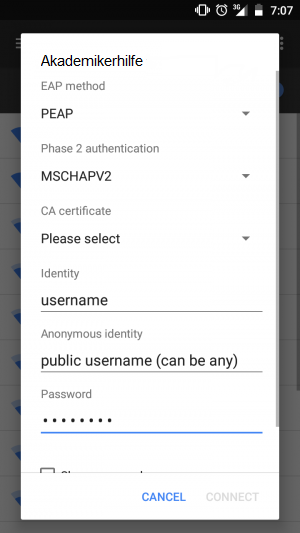 Step2:
Use the same login credentials as for the Akademikerhilfe-Portal
Note: You have to change your the portal-password before the login works!


As always: if you have further questions or problems with the configuration, drop a mail: support@pfeilheim.sth.ac.at